operanthouseのヘッダー
Kitaya lab
Tracker
What's Tracker?
Preparation
How to use it
Here I'll expain with a sample video of three chamber social interaction test.
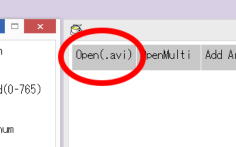
1. Run Tracker2.47.exe or the latest version.
2. Open the video file (A sample video is available in the "Sample video" folder).
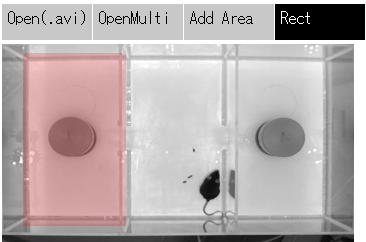
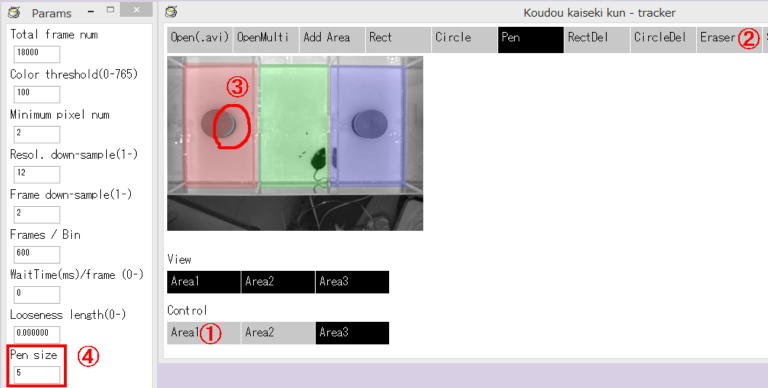
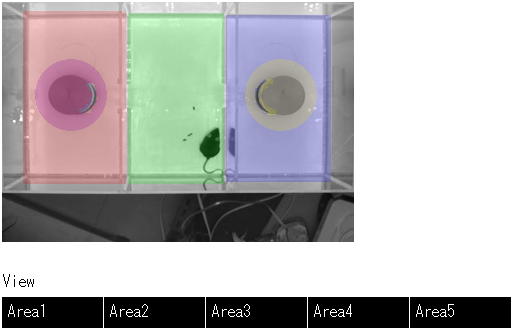
3. To pain the left area, click the "Rect" button.
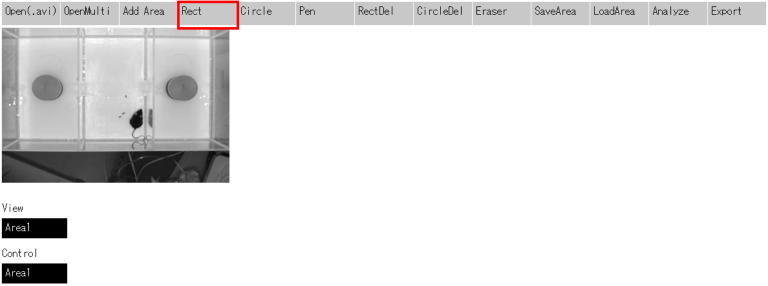
4. Enclose the left room with the square to paint (Paint with a little overhang to track animal while it is rearing). The colored area will be Area#1. If you want to erase the painted color, use "RectDel" or "CircleDel" (delete the color inside the shapes) or "Eraser" (Erase color while dragging. The size can be changed by changing the value in the entry field labeled "Pen size" on the left window).
5. Next, define the center area. Click the "Add Area" button to create Area#2.
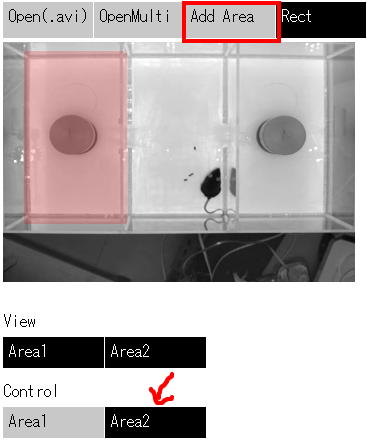
6. Pain the center room in the same way before.
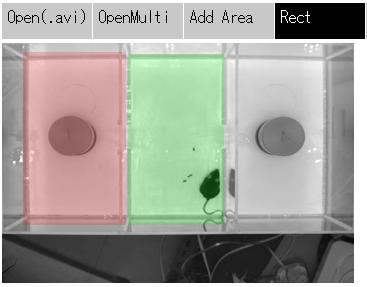
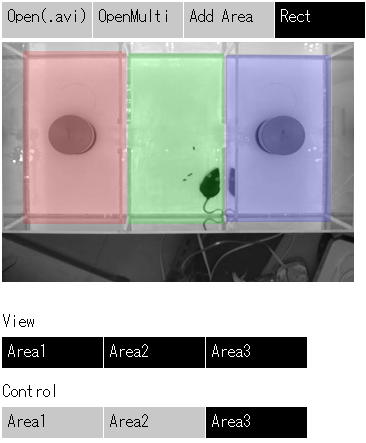
7. Repeat the same for the right room.
8. This software considers a black object to be a mouse when the background is white (vice versa when the background is black) so we need to erase the area overlapping the shaded part of the cup to avoid false detection. Here modify the area#1 first.
1. Click the Area#1 in the Control menu to activate this area.
2. Select "Eraser".
3. Erase the area on the shaded part (Eraser size is changable with the value set in 4. You can also use "RectDel" or "CircleDel" to erase the area).
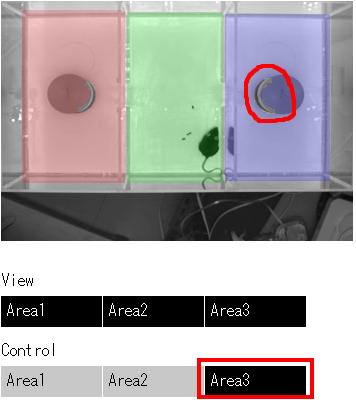
9. Do the same in the right area. Select area#3 and erase the drak area.
If you want to analyze contact number to the wire cup (Contact is defined as an entry of any part of the animal body into the zone. Here we consider contact as a sniffing to the chamber), follow the step 10-14. Otherwise move to step 15.
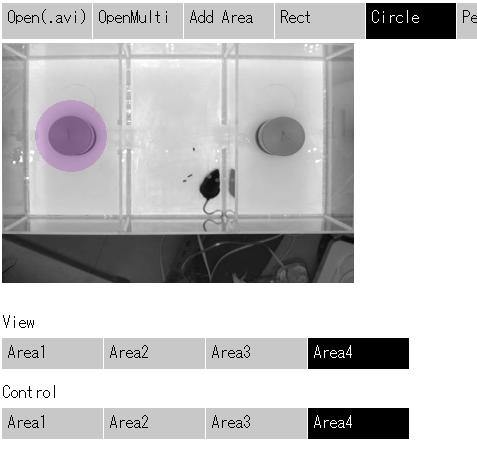
10. Let add contact zones of the wire cups. Hide area#1-3 by clicking the view buttons.
11. Add area#4 and paint the zone with the "Circle" button.
12. Erease the zone over the shaded area.
13. In the same way add another contact area as area#5.
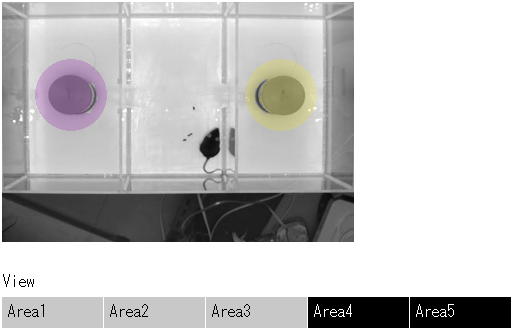
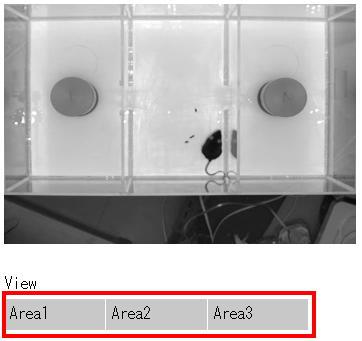
14. Display all areas and check for any problems.
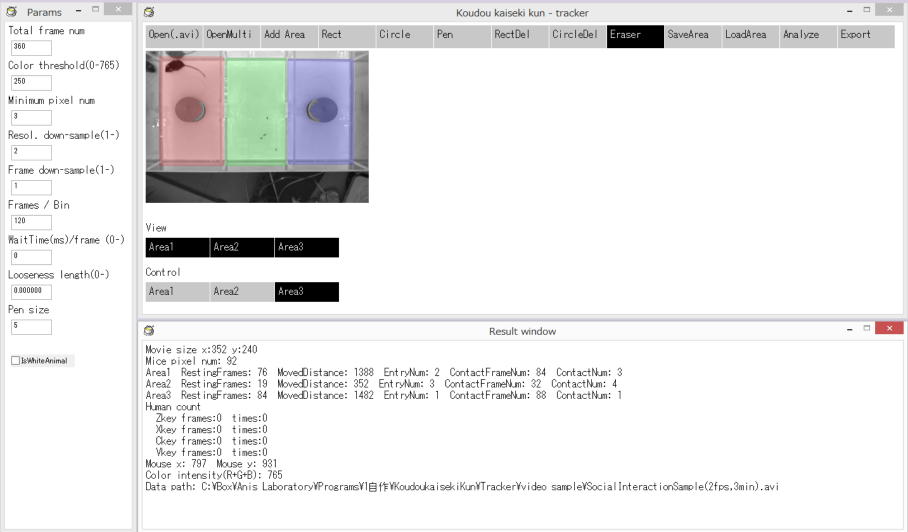
15. Lastly, enter the parameters for the analysis,
Video FPS: Video frame rate.
Video length: Length of the video to be analyzed.
Color threshold: Mouse detection threshold. Detection sensitivity is higher when this value is lower (When the animal is black).
Minimum pixel num: If the number of sampling points that detect mouse is below this number, the program considers the tracking is lost.
Resol. down-sample: Specify here how much to downsample the video resolution (e.g. If 4, the analysis resolution is reduced to 1/4 both vertically and horizontally. If 1, the downsample doesn't take place). Larger downsamples allow for less processing time.
Frame down-sample: Specify here how often to thin out the video frames (e.g. If 5, only one frame will be analyzed every five frames. If 1, all frames will be analyzed).
BinDuration: Number of frames per bin.
WaitTime/frame: Wait time per frame during analysis. Set 0 if you want the fastest analysis.
Looseness length: A correction parameter for ambulatory ataxia (see below for more details). Set 0 if the subject doesn't have an ataxia.
Pen size: Size of Pen and Eraser.
IsWhiteAnimal: Check if the subject is white.
Leave cursor when lose track: If checked, the track cursor stays at the position where the animal is last detected (The program considered that the animal is still at the cursor position). If you want to measure the lost tracking time which corresponds to the resting time in dark room in light/dark test, uncheck it.
Background noise filter: Check if the subject in on metal grid floor (The value of the resolution-down sampling must be lower if this function is active. This function removes isolated detected-pixel points).

16. Click the Analyze button to start the analysis. If you want to record durations of certain behaviors manually, increase the WaitTime in the parameter window to slow down the playback speed and use Z/X/C/V keys on the keyboard to record events. Repeat this procedure to analyze all video files.

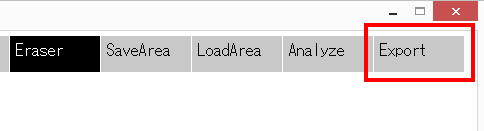
17. After all the analysis has done, click the "Export" button to output the result files.
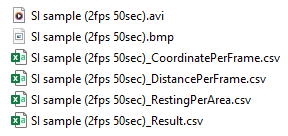
18. The following files are generated.
*_Result.csv: This file includes resting duration, moved distance, entries and contact number (contact means that at least part of the body enters the area) and human count in each area.
*_DistancePerFrame.csv: The moved distance for each frame. When multiple videos are analyzed, the results of the following videos are added without delimitation.
*_RestingPerArea.csv: This shows where the animal stayed and which human count button was pressed for each frame.
*_CoordinatePerFrame.csv: Coordinates of the animals in each frame.
*.bmp: A trajectory of animal movement (this file is exported csv files in the directly where the video filed is located).
(The unit of the all distances in the result file is the pixel)
19. You can save and load the defined areas with "SaveArea" and "LoadArea" buttons.
*About wobble correction function
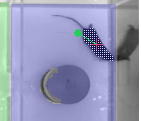
We found some ataxic mouse moves its center of body by just swing its body while staying in one place. To avoid this behavior from being measured as movement, this function assumes that a string with a weight attached to the subject (thus the weight moves as if it were being dragged by the subject) and it tracks the weight instead of the center of the body. For accurate analysis, adjust the length of the string with "Looseness length" in the parameter window.