operanthouseのヘッダー
Kitaya lab
Setup of RaspberryPi 4
Raspberry PI OS (32bit) released on 2022/9/22 is used in this instruction so if you have any trouble in installation with the latest version, please find and use the same version from here,
http://downloads.raspberrypi.org/raspbian/images/
Connect keyboard and mouse. If you don't have wifi access, connect ethernet cable (Some Universities don't allow wifi access from Raspi so ask IT office if you cannot connect it). Turn on the switch on the power cable of the Raspi.
After the initial setting, you will the desktop.

Install the soft keyboard
(https://pimylifeup.com/raspberry-pi-on-screen-keyboard/)To save a space for the keyboard, install a soft keyboard.
Run the terminal by clicking the icon.

We can install various software in this terminal.

First, to update Raspberry Pi OS, enter the following text into the terminal and press Enter.

Then, type the following command.
sudo apt upgrade
sudo apt install onboard
When asked "Do you want to continue?" type "y" and press Enter.
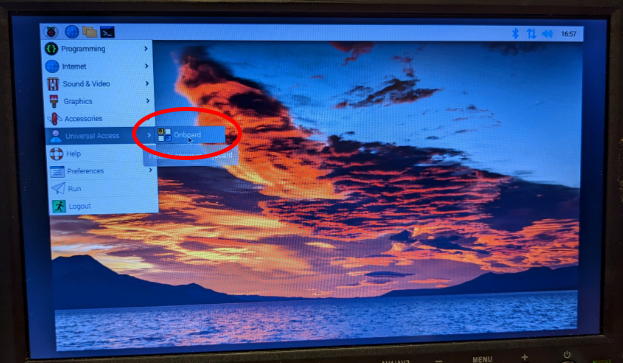
"Onboard" is the virtual keyboard software. You can find it in the "Universal access" in the start menu as shown below.

Turn off the sleep function
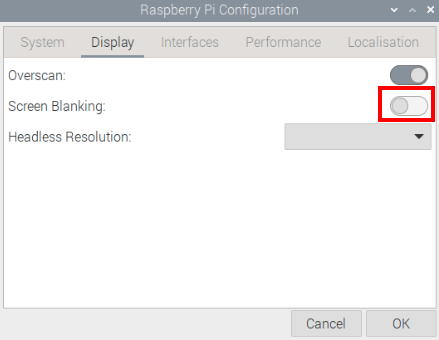
Raspi will sleep after a certain period of time without operation. To deactivate this function, run "Raspberry Pi Configuration".
Set screen blanking to disable and reboot Raspi.
Install OpenCV
(https://raspberrypi-guide.github.io/programming/install-opencv)OpenCV which is necessary for the camera capturing so let's install this library package.
Before installing OpenCV, install packages required for OpenCV. You can paste to the terminal by right clicking and chose "paste" on the terminal window.
sudo apt-get install build-essential cmake pkg-config libjpeg-dev libtiff5-dev libjasper-dev libpng-dev libavcodec-dev libavformat-dev libswscale-dev libv4l-dev libxvidcore-dev libx264-dev libfontconfig1-dev libcairo2-dev libgdk-pixbuf2.0-dev libpango1.0-dev libgtk2.0-dev libgtk-3-dev libatlas-base-dev gfortran libhdf5-dev libhdf5-serial-dev libhdf5-103 python3-pyqt5 python3-dev -y
Then install OpenCV as followed,
pip install opencv-python==4.5.3.56
Install NumPy as well,
pip install -U numpy
Check if the installation was successful or not by the following commands,
python3
import cv2
cv2.__version__
If you see the version number, OpenCV has been successfully installed.
Enter the following command to exit python mode,
exit()
Install Arduino editor
Enter the following install command,
sudo apt install arduino
Install Operant House
Download program of OperantHouse from the follow nad unzip it to the desktop.
OperantHouse_230221.zip

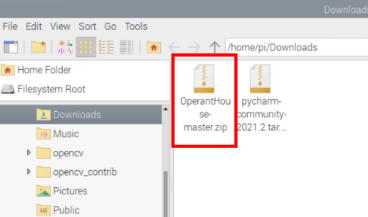
When you see this, press the up arrow to move one level forward.

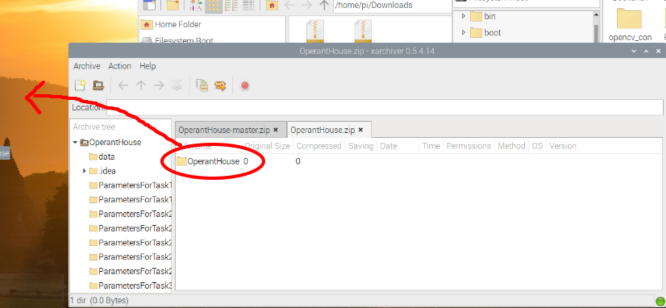
Drag and drop the OperantHouse folder to the desktop.
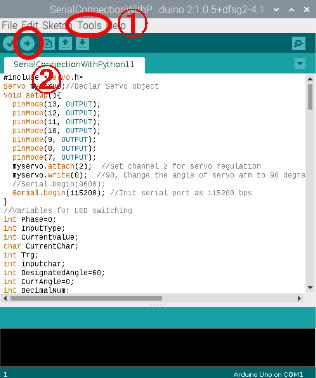
Transfer the Arduino program to the connected Arduino. Open the following file,
OperantHouse --> SerialConnectionWithPython** --> SerialConnectionWithPython**.ino
Chose the activated port by clicking Tools --> Port. Then click right arrow icon to transfer and build the program.
Everything to run OperantHouse is ready now.
Find Thonny and run it (I recommend to set Thonny as default to run python program).

Load the latest OperantHouse program (OperantHouse*.py)

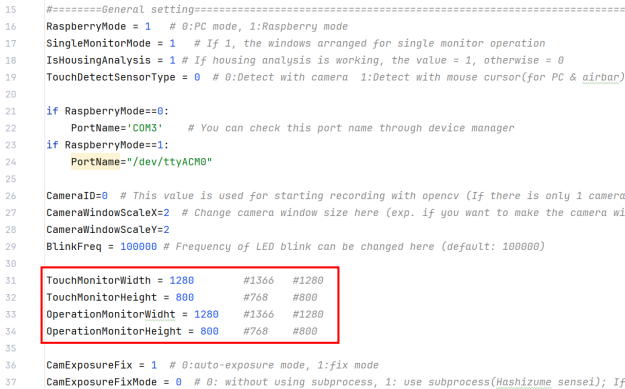
See if the basical setting is set as followed. If different number is substituted, correct it.

If the monitor resolution is not 1280x800 pixels, change the values here. The size and position of the touch window are determined based on these values.
Click "Run".

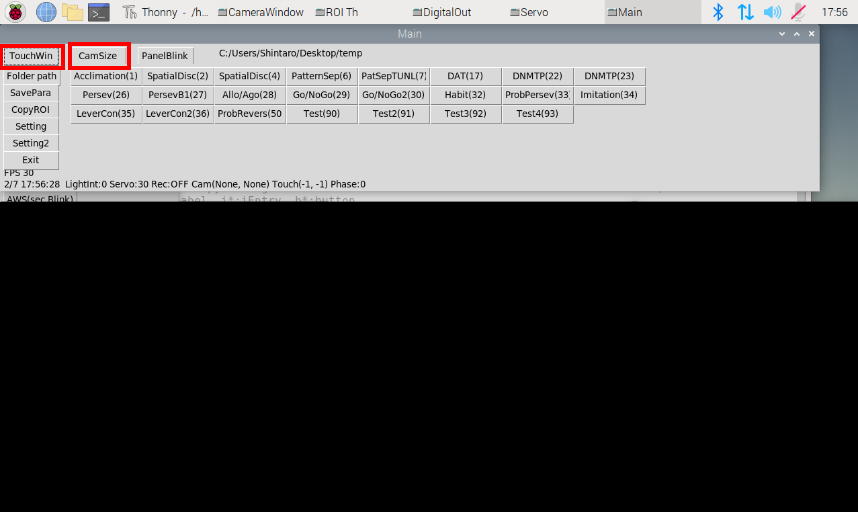
These are windows of OperantHouse.
You can show/hide touch-screen window by clicking "TouchWin button" and resize camera window by clicking CamSize button.
Check if you see the image in the camera window.

Check if you can switch cue LED, infrared LEDs, roof illuminations and servo with the following buttons.
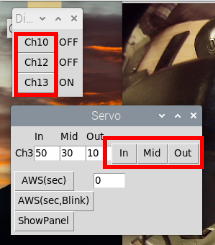
If everything works well, you have successfully installed OperantHouse. Click the "Exit" button on the left of the main window or "Stop" button on Thonny to close the program.
Change the color of the desktop
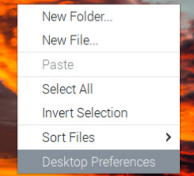
Let's darken the color of the desktop not to distruct subject animal.Right-click on an empty space of the desktop and select "Desktop Preferences."
Set as followed and click "OK."


If you'll make multiple devices, I reccomend you to create a image copy of the SD card at this point because it is not feasible to repeat these initial setting for every device. You can find the way in "Tips" on the left menu.
Install TeamViewer
To operate the device remotely, install TeamViwer(remote desktop software). You can find the installer for Raspi in the official site.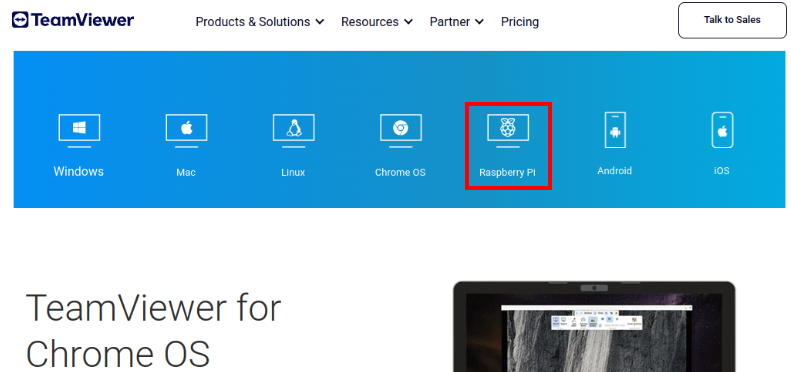
Launch TeamViewer. Enter the device name and chose dark theme and assign TeamViewer account (create it if you don't have).

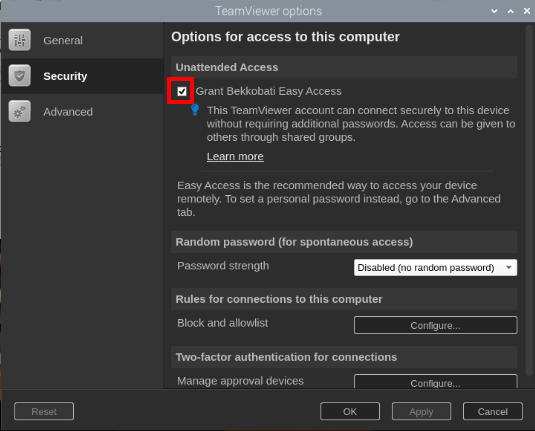
Click Security tab and check "Easy Access" to skip password entry. Check if you can access the Raspi from your computer.
The configuration of the Raspi has done.
The process after this dependons on the optional parts.
1. If you'll use only touch-screen, go to Option parts assemble(Touch-screen) page.
2. If you'll use lever modules, go to Option parts assemble(Lever) page.
3. If you'll use sensor bar (NNAMC3460PCEV), go to Option parts assemble(Sensor bar) page.
If you are not sure you should take option 1 or 3, try 1 first (option 3 is only needed when holes are vertical shape and there is little space between adjuscent mask holes).